Choosing roof color traditionally required imagination, small samples, and hope. Homeowners struggled to envision how different shingle colors would actually look on their specific home—often resulting in expensive regret lasting 20-30 years.
Roof color visualizer technology solves this problem completely. These digital tools let you “try on” hundreds of shingle colors virtually, seeing realistic full-home visualizations before spending a single dollar on installation.
At Prrotect Roofing, we help Missouri and Illinois homeowners use roof color visualizer tools effectively to make confident color decisions. We understand which platforms provide the most accurate results, how to interpret visualizations correctly, and when physical samples remain necessary.
Whether you’re replacing an existing roof, building new construction, or simply exploring options, roof color visualizer tools transform the decision-making process. Let’s explain exactly how these tools work, their benefits and limitations, and how to use them effectively.
What Is Roof Color Visualizer?
Roof color visualizer refers to digital software tools that overlay different shingle colors onto photos of your home, creating realistic visualizations showing how finished roofs will appear. These tools use advanced image processing to apply manufacturer shingle colors accurately to roof surfaces.
The technology has revolutionized residential roofing color selection. Previously, homeowners relied on 6-inch sample shingles viewed under store fluorescent lighting—a method providing minimal insight into real-world appearance on full-size roofs under natural sunlight.
How Roof Color Visualizer Works:
Photo upload or template selection: Upload a clear photo of your home’s exterior, or select a similar architectural model from the tool’s library of pre-loaded house styles.
Roof area identification: The software automatically identifies your roof area or lets you manually outline roof boundaries for accurate color application.
Color overlay application: Browse manufacturer shingle collections and click colors to apply them. The roof color visualizer instantly overlays your selection onto the roof area.
Realistic rendering: Advanced algorithms adjust for lighting, shadows, angles, and texture to create realistic appearance matching how actual shingles will look installed.
Save and compare: Create multiple versions with different colors, save them, and view side-by-side comparisons to evaluate which option works best.
Share capabilities: Download, print, or share visualizations with family members, contractors, and neighbors for input before finalizing decisions.
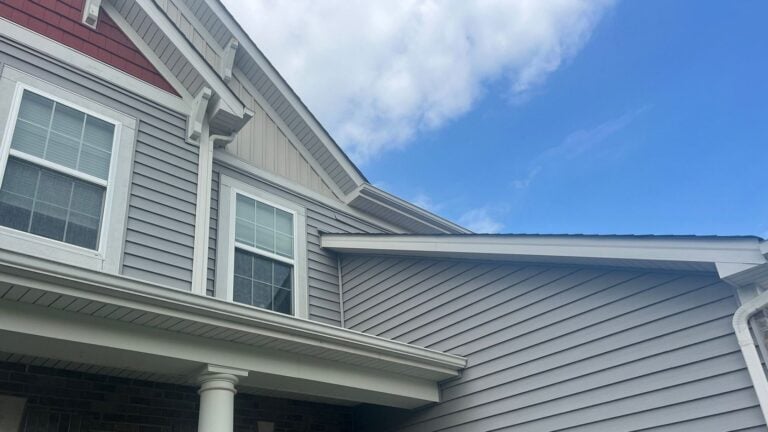
[INSERT IMAGE 1: Step-by-step visual showing roof color visualizer process from photo upload through final visualization with multiple color options]
Types of Roof Color Visualizer Tools Available
Multiple platforms offer roof color visualizer capabilities, each with distinct features, advantages, and limitations.
Manufacturer-Specific Roof Color Visualizer
GAF Virtual Remodeler, Owens Corning Design EyeQ, IKO ROOFViewer, CertainTeed ColorView, and Atlas Roof & Home Design Studio represent this category. These tools show only that manufacturer’s products.
Advantages: Accurate color representation of specific products, integration with manufacturer warranties, often most sophisticated technology, usually free to use.
Disadvantages: Limited to single manufacturer’s options, can’t compare across brands, may not show products your contractor doesn’t stock.
Best for: Homeowners who’ve already selected a manufacturer or whose contractor works primarily with one brand.
Independent Multi-Brand Roof Color Visualizer
Independent platforms like RoofColorVisualizer.com or HOVER allow cross-brand comparisons. These tools show shingles from multiple manufacturers.
Advantages: Compare different brands side-by-side, broader color selection, not locked into single manufacturer, often include various roofing materials beyond asphalt shingles.
Disadvantages: May have less accurate color representation than manufacturer tools, possible subscription costs for full features, smaller shingle databases.
Best for: Homeowners exploring multiple manufacturers or wanting to compare options from different brands before deciding.
Contractor-Provided Roof Color Visualizer
Many roofing contractors offer visualization services using professional software like Hover or manufacturer-specific tools. Contractors create visualizations for you during consultation.
Advantages: Professional expertise guiding color selection, accurate measurements and estimates included, integration with project quotes, often includes siding and trim visualization.
Disadvantages: Requires contractor appointment, limited to brands contractor stocks, potential sales pressure during consultation.
Best for: Homeowners ready for serious estimates who want professional guidance throughout the selection process.
Mobile App Roof Color Visualizer
Apps like Atlas Select Your Roof (iPad) let you photograph your home directly with your device and immediately visualize shingle options on-site.
Advantages: Real-time visualization while standing at your home, convenient for comparing colors with actual exterior elements, instant photos without computer transfers.
Disadvantages: Smaller screen limits detail visibility, may have fewer features than full web platforms, typically manufacturer-specific.
Best for: Homeowners who prefer mobile-first approach and want to visualize options while physically at their property.
Major Roof Color Visualizer Platforms Compared
Understanding specific platforms helps you choose the right tool for your needs.
GAF Virtual Remodeler
Website: gaf.com/virtualremodeler Cost: Free Manufacturer: GAF (North America’s largest roofing manufacturer)
GAF Virtual Remodeler offers the most comprehensive roof color visualizer available. The platform shows complete Timberline HDZ, Timberline UHDZ, Camelot II, and designer shingle lines.
Beyond roofing, you can visualize siding, windows, doors, shutters, and trim—creating complete exterior remodeling plans. This comprehensive approach helps ensure all elements work together cohesively.
Particularly strong feature: Multiple angle views and lighting conditions show how colors appear throughout the day. This addresses the common problem of colors looking different in morning versus afternoon light.
Owens Corning Design EyeQ
Website: owenscorning.com/roofing/designeyeq Cost: Free Manufacturer: Owens Corning
Owens Corning Design EyeQ provides excellent roof color visualizer interface with curated color palettes based on architectural style and regional preferences. This guidance helps overwhelmed homeowners narrow choices effectively.
The platform includes a style quiz recommending shingle colors based on your aesthetic preferences—simplifying the process for homeowners uncertain where to start.
Color representation is highly accurate. Users consistently report visualizations matching installed roofs closely when using actual product samples for verification.
IKO ROOFViewer
Website: iko.com/roofviewer Cost: Free Manufacturer: IKO
IKO ROOFViewer focuses on Canadian and northern US markets with shingles suited for cold climates. The roof color visualizer shows Cambridge, Dynasty, Marathon, and Crowne Slate lines.
Strong rotation and zoom capabilities let you inspect shingle appearance from various angles. This feature helps evaluate how neighbors and passersby will see your roof from different vantage points.
Particularly good for evaluating how dimensional shingles create shadow lines and texture visible from street level.
CertainTeed ColorView
Website: colorview.certainteed.com Cost: Free Manufacturer: CertainTeed
CertainTeed’s roof color visualizer emphasizes Landmark and Presidential shingle collections. The interface provides clean, straightforward visualization without overwhelming features.
Excellent side-by-side comparison functionality makes evaluating subtle color differences between similar shades easier. This proves particularly valuable when choosing between weathered wood variations or different gray tones.
Atlas Roof & Home Design Studio
Website: atlasroofing.com (web) + iPad app Cost: Free Manufacturer: Atlas Roofing
Atlas provides both web-based and mobile roof color visualizer options. The iPad app (Select Your Roof) lets you photograph homes directly and immediately visualize shingle options—perfect for real-time decision-making.
Unique feature: Algae Aging Simulator shows how shingles with and without algae resistance will appear over time. This forward-looking visualization helps homeowners understand long-term appearance beyond initial installation.
My Roof Color Gauge feature allows quick color swiping over your home photo without complex masking—fastest visualization method available.
For professional roofing services with expert color visualization guidance in Missouri and Illinois, Prrotect Roofing provides residential roof replacement with comprehensive consultation.
Roof Color Visualizer Advantages
Understanding benefits helps you appreciate why these tools have become essential for modern roof replacement projects.
Eliminates Guesswork and Reduces Regret
Small samples under store lighting provide minimal insight into real-world appearance. Roof color visualizer shows full-scale color on your actual home, dramatically improving decision confidence.
Studies show homeowners using visualization tools report 90%+ satisfaction with color choices compared to 60-70% satisfaction without visualization. The ability to see before buying eliminates expensive buyer’s remorse.
Saves Time and Money
Visiting multiple suppliers, collecting samples, and mentally imagining results takes hours or days. Roof color visualizer lets you evaluate dozens of options in minutes from your computer.
Avoiding wrong color choices saves $8,000-25,000 in premature replacement costs. Once shingles are installed, color changes require complete roof replacement.
Enables Side-by-Side Comparison
Evaluating individual colors sequentially makes comparison difficult. Roof color visualizer lets you create multiple versions and view them simultaneously, making differences immediately obvious.
Side-by-side comparison reveals which colors complement your brick, siding, trim, and landscaping best—nuances invisible when viewing options separately.
Facilitates Family Decision-Making
Roof color affects entire household for decades. Roof color visualizer lets all family members see options and provide input before installation, reducing conflicts and ensuring everyone supports the final choice.
Save visualizations and revisit them over days or weeks. Initial preferences often change after seeing options multiple times under different conditions.
Helps Visualize Complete Exteriors
Advanced roof color visualizer tools let you change siding, trim, shutters, and doors simultaneously. This comprehensive approach ensures all elements work together rather than optimizing roof color in isolation.
Many homeowners discover their current siding color limits roof options. Visualization tools help you evaluate whether changing siding opens better roofing possibilities.
Provides Contractor Communication Tools
Show contractors exactly what you want rather than describing it verbally. Roof color visualizer images eliminate miscommunication between homeowners and installers.
Many contractors provide quotes more quickly when presented with clear visualization images showing precisely which products you’re requesting.
Tests Climate-Appropriate Colors
Roof color visualizer helps evaluate light versus dark shingles for your specific home and surroundings. See how different colors appear against your landscaping, neighboring homes, and architectural details.
This testing reveals whether dramatic contrasts (like black roofs on white homes) work well or overwhelm your specific property.
Roof Color Visualizer Disadvantages
No technology is perfect. Understanding limitations helps you use roof color visualizer tools appropriately and avoid over-reliance.
Screen Color Accuracy Limitations
Computer monitors, tablets, and phones display colors differently. Screen calibration, brightness settings, color profiles, and device quality all affect how shingle colors appear on your screen.
What looks gray on one screen may appear more blue or brown on another. Roof color visualizer provides excellent approximations but not perfect color matching.
Solution: Always verify final choices with physical samples viewed on your actual roof under natural daylight conditions.
Lighting and Texture Simplification
Roof color visualizer algorithms approximate how shingles interact with light but can’t perfectly replicate three-dimensional texture, shadow lines, and granule variation visible on installed roofs.
Dimensional shingles create depth through layering and shadowing—effects difficult to fully capture in two-dimensional visualization.
Solution: View physical samples from street level to understand texture and dimensional effects visualization tools can’t fully represent.
Photo Quality Dependence
Roof color visualizer accuracy depends heavily on input photo quality. Poor lighting, harsh shadows, incorrect angles, or low resolution limit visualization effectiveness.
Photos taken in bright midday sun create harsh shadows making visualization difficult. Overcast photos provide better base images for accurate color overlay.
Solution: Take multiple photos in different lighting conditions and use the clearest, most evenly-lit image for visualization.
Limited Material Selection
Manufacturer-specific roof color visualizer tools show only that brand’s products. If your contractor primarily stocks different manufacturers, visualizations may not show actually available options.
This creates frustration when homeowners select colors not available through their chosen contractor.
Solution: Confirm which manufacturers your contractor stocks before spending extensive time visualizing specific brand options.
Simplified Architecture Representation
Complex roof features like dormers, valleys, multiple planes, and varying pitches challenge visualization algorithms. Roof color visualizer tools work best on simple gable or hip roofs.
Unusual architectural details may not render accurately in visualization, particularly in areas where multiple roof planes meet.
Solution: Focus on dominant roof areas in visualization. Request contractor input on how colors will appear on complex features.
Can’t Predict Aging and Weathering
Roof color visualizer shows new shingle appearance. Over 5-10 years, colors fade, granules wear, and algae/moss may develop—changing appearance significantly.
Light colors show dirt and algae more visibly. Dark colors fade more dramatically. These long-term changes aren’t visible in initial visualization.
Solution: Research how your selected shingle performs long-term. Read reviews and view installed roofs several years old in your area.
No Substitute for Physical Samples
Despite excellent technology, roof color visualizer remains an approximation tool. Physical samples remain essential for final verification before ordering thousands of dollars in materials.
Many homeowners skip physical verification, trusting visualization alone—then discover colors appear different than expected on installation day.
Solution: Treat roof color visualizer as preliminary selection tool. Always verify final choices with large physical samples.
According to the National Roofing Contractors Association, roof color visualizer tools should supplement—not replace—physical sample verification and professional contractor guidance for optimal color selection.
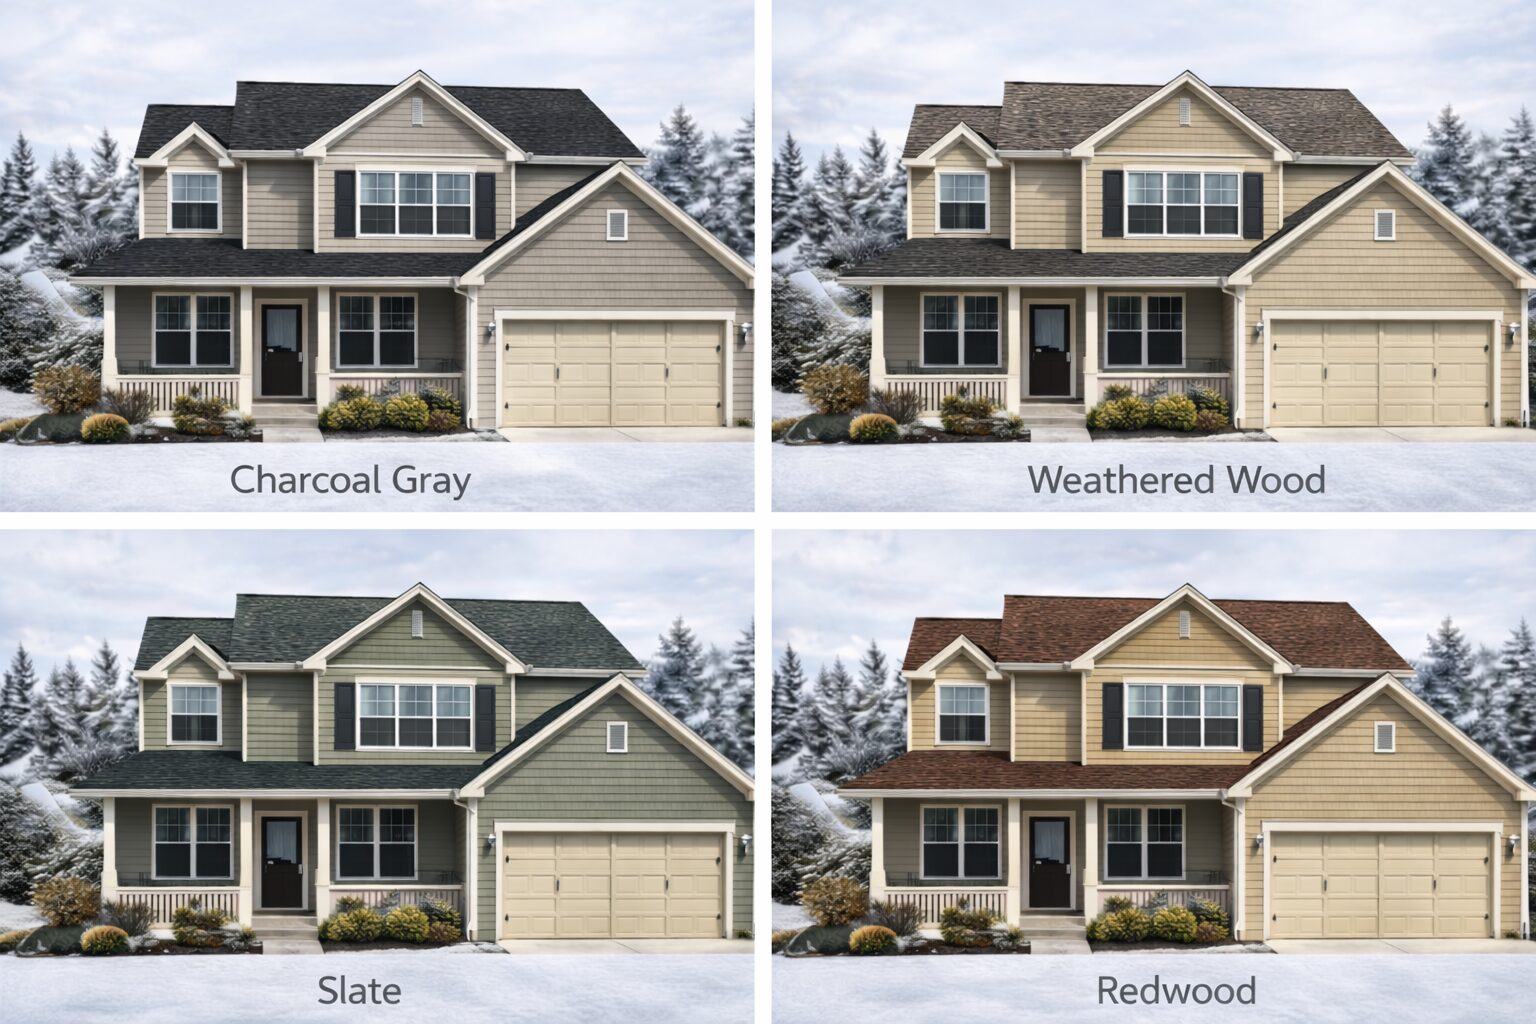
[INSERT IMAGE 2: Comparison showing same house with roof color visualizer applied showing 4 different shingle colors demonstrating tool capabilities]

How To Use Roof Color Visualizer Effectively
Simply accessing a tool isn’t enough—strategic use maximizes results and ensures accurate decision-making.
Step 1: Prepare Quality Photos
Take photos during overcast days or in shade to avoid harsh shadows. Even lighting produces best visualization results.
Capture straight-on angles rather than extreme perspectives. Photos taken from across the street at eye level work better than close-up angled shots.
Include context: neighboring homes, landscaping, street views. Your roof doesn’t exist in isolation—it must work within the broader environment.
Clean your home’s exterior before photographing. Dirty siding or grimy windows distract from color evaluation in visualizations.
Step 2: Identify Fixed Elements
Before using roof color visualizer, inventory elements you won’t change: brick color, stone veneer, existing siding, window trim, foundation, architectural style, permanent landscaping.
Your roof color must complement these unchangeable features. Use visualization to test how different shingle colors interact with your specific fixed elements.
Step 3: Explore Broadly Before Narrowing
Start by testing colors from all families: browns, grays, blacks, beiges, blues, greens. Even colors you think won’t work deserve brief evaluation.
Roof color visualizer makes exploration free and instant. Homeowners often discover unexpected colors work beautifully on their specific homes.
Create 10-15 initial visualizations spanning the full color spectrum. This broad exploration reveals possibilities you might have dismissed without seeing them.
Step 4: Narrow Systematically
After initial exploration, eliminate obvious poor choices. Narrow to 6-8 promising options representing 2-3 different color families.
Create refined visualizations of these finalists. Save each with descriptive names for easy comparison.
Step away for 24-48 hours before final selection. Fresh eyes often reveal preferences that weren’t obvious during initial exploration.
Step 5: Evaluate Practical Considerations
Use roof color visualizer to specifically test climate-appropriate options. In Missouri and Illinois where summers reach 90-100°F, evaluate how light and dark colors will affect cooling costs.
Consider neighborhood context. If surrounding homes have predominantly neutral roofs, test how your home looks with similar versus contrasting colors.
Check HOA guidelines before finalizing. Some associations restrict shingle colors to pre-approved options.
Step 6: Test Complete Exterior Combinations
If using advanced roof color visualizer with siding/trim capabilities, experiment with complete exterior color schemes. Sometimes changing siding colors opens better roofing possibilities.
This comprehensive approach ensures all elements harmonize rather than optimizing roof alone.
Step 7: Share and Gather Input
Send visualizations to family members, trusted friends, and neighbors for honest input. Others often notice issues or opportunities you miss.
Show visualizations to your contractor. Experienced professionals can confirm whether visualizations accurately represent actual products and identify potential issues.
Step 8: Verify With Physical Samples
Select your top 2-3 choices from roof color visualizer results. Request large physical samples from your contractor or manufacturer.
Place samples on your roof at different times of day—morning, midday, afternoon, and even evening if possible. Colors appear dramatically different under varying light conditions.
View samples from street level where most people see your home. What looks good up close may appear different from 50-100 feet away.
Roof Color Visualizer Cost Considerations
Understanding costs helps you budget appropriately and know what to expect.
Free Consumer Roof Color Visualizer Tools:
- GAF Virtual Remodeler: $0
- Owens Corning Design EyeQ: $0
- IKO ROOFViewer: $0
- CertainTeed ColorView: $0
- Atlas Design Studio: $0
All major manufacturers provide free roof color visualizer access. These tools require no payment, subscription, or account creation (though creating accounts enables saving designs).
Premium Independent Platforms:
- Basic visualization: Free
- Advanced features: $5-20 monthly subscriptions
- Professional contractor tools: $50-200 monthly
Independent platforms often offer free basic visualization with premium features (unlimited saves, high-resolution exports, complete exterior remodeling) requiring paid subscriptions.
Most homeowners find free manufacturer tools sufficient and don’t need premium subscriptions.
Contractor Visualization Services:
- Included with free estimates: $0
- Standalone consultation: $100-300
Many contractors include roof color visualizer service as part of free estimate processes. They create professional visualizations during in-home consultations.
Some contractors charge for detailed visualization consultations if you’re not ready to commit to estimates or installation.
Physical Sample Costs:
- Standard samples (6″x12″): Free from contractors/suppliers
- Large samples (12″x36″): $5-20 per sample
- Full bundle samples: $50-150 (often refundable with purchase)
Physical samples remain essential despite excellent visualization technology. Most suppliers provide standard samples free. Larger verification samples may cost but prove worthwhile for major decisions.
Total Cost of Effective Color Selection:
Using free manufacturer roof color visualizer tools: $0 Physical samples for top 2-3 choices: $0-40 Professional contractor visualization consultation: $0 (typically included)
Total expected cost: $0-40 for complete, thorough color selection process.
The minimal cost investment prevents $8,000-25,000 mistakes from wrong color choices requiring premature replacement.
Common Roof Color Visualizer Mistakes
Avoiding these errors ensures you get maximum benefit from visualization tools.
Mistake 1: Trusting Visualization Alone
Homeowners who skip physical sample verification often discover colors look different than visualized. Screen representations never match physical reality perfectly.
Solution: Use roof color visualizer for preliminary selection, physical samples for final verification. This two-step process ensures accuracy.
Mistake 2: Poor Quality Input Photos
Blurry photos, harsh shadows, extreme angles, or cluttered backgrounds limit visualization effectiveness. The tool can only work with what you provide.
Solution: Take multiple high-quality photos in even lighting from appropriate distances and angles. Quality input produces quality results.
Mistake 3: Ignoring Fixed Element Limitations
Some exterior colors severely limit compatible roof colors. Red brick, certain siding colors, or unique architectural elements may require specific shingle tones.
Solution: Identify fixed elements before visualization. Test how shingle colors interact specifically with your unchangeable features.
Mistake 4: Viewing On Single Device
Colors appear different on phones versus tablets versus computers. Relying on one device may mislead.
Solution: View visualizations on multiple devices and in different lighting conditions. This reveals how colors truly appear rather than device-specific artifacts.
Mistake 5: Making Quick Decisions
Initial color preferences often change after reflection. Rushing decisions based on first impressions leads to regret.
Solution: Create multiple visualizations, save them, and review over several days before finalizing. Give yourself time to evaluate thoroughly.
Mistake 6: Overlooking Climate Implications
Roof color visualizer shows aesthetic appeal but doesn’t display temperature or energy cost differences between light and dark shingles.
Solution: Research energy efficiency implications separately. In hot climates, aesthetic preferences may need to balance with practical cooling cost considerations.
FAQs About Roof Color Visualizer
Are roof color visualizer tools accurate?
Roof color visualizer tools provide 80-90% accurate color representations. Factors like screen calibration, lighting, and material texture create small variations from actual installed appearance. Always verify final choices with physical samples viewed under natural daylight on your actual roof before purchasing.
Is roof color visualizer free?
Yes, major manufacturer roof color visualizer tools (GAF, Owens Corning, IKO, CertainTeed, Atlas) are completely free. Independent platforms may charge for premium features, but basic visualization capabilities typically remain free. Contractors often include visualization services with free estimates.
Can roof color visualizer show other materials besides shingles?
Advanced roof color visualizer platforms show metal roofing, tile, slate, and even siding, windows, doors, and trim. Manufacturer-specific tools typically focus on that brand’s product lines. Independent platforms often include broader material selections.
How do I get the best results from roof color visualizer?
Use high-quality photos taken in even lighting without harsh shadows. Test multiple colors across different families before narrowing. View visualizations on different devices and share with others for input. Always verify final selections with physical samples before ordering materials.
Do contractors use roof color visualizer?
Yes, most professional roofing contractors use visualization tools during estimates and consultations. Contractors often have access to professional-grade software providing more features than consumer versions. Many include visualization services as part of free estimate processes.
Get Expert Roof Color Selection Guidance
While roof color visualizer tools provide excellent preliminary selection capabilities, professional guidance ensures optimal choices considering climate, architecture, resale value, and practical factors beyond aesthetics alone.
At Prrotect Roofing, we help homeowners throughout Missouri and Illinois use visualization tools effectively while providing expert color recommendations based on thousands of successful installations.
We provide physical samples, on-site color consultations, and experienced guidance ensuring your selection looks beautiful and performs well for decades.
Call today: (314) 292-9331 for professional roof color consultation.
Serving the St. Louis metro area with residential roofing expertise you can trust. Don’t guess about roof colors—combine visualization tools with professional guidance for choices you’ll love for 20-30 years.
Your home deserves the perfect roof color. Let us help you find it.