For many homeowners finishing a roofing project, what to check after having a new roof installed becomes the immediate question the moment the crew packs up and the truck pulls away. You’re left standing in your yard staring up, wondering if everything was done correctly.
A new roof is one of the largest investments you’ll make in your home, yet most people have no idea what to look for once installation is complete. This guide is the practical checklist you wish you had beforehand written for homeowners, not roofers so you can verify the work confidently without climbing a ladder or learning construction jargon.
What to Check After Having a New Roof Installed
Knowing what to check after having a new roof installed is vital for long-term protection. Start by inspecting the yard for stray nails and debris, then verify that the flashing and shingles are uniform. A thorough final walkthrough ensures the job meets professional standards and prevents future leaks.
A documented post-installation inspection also strengthens your position with your insurance company. Insurers often request proof that the roof was properly installed and maintained before approving claims. Without documentation, they may argue homeowner negligence. Taking the time to verify the work now protects both your investment and your long-term coverage.
Do a Ground-Level Visual Inspection First
Before anything else, prioritize safety. Do not climb onto your roof; instead, walk the full perimeter of your home using binoculars or your phone’s zoom feature to get a clear view. You are looking for uniform shingle alignment across every slope, consistent color with no mismatched bundles, and a straight, clean ridgeline. Ensure there are no lifted, curling, or uneven edges, and verify that the drip edge has a proper overhang along the eaves while flashing sits flush around chimneys, skylights, and vents.
One of the simplest and most effective techniques is the “uniformity test,” where you simply check if the roof looks consistent from one end to the other. Visible red flags from the ground often indicate a rushed installation or improper fastening, so if something looks slightly off in one section, take a photo immediately. Documenting anything questionable before the weather has a chance to obscure the evidence is a critical step in protecting your investment.
Check the Gutters and Yard Before Cleanup Is Done
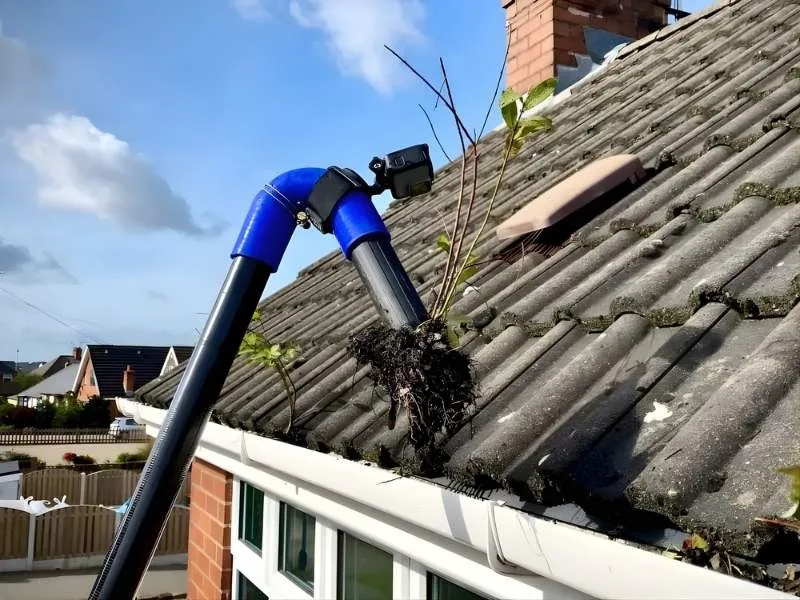
Before the crew completes cleanup, you should carefully inspect your gutters for heavy granule deposits and check downspout exits for shingle debris. It is equally important to scan your driveway, yard, and flower beds for stray nails or sharp fragments that may have fallen during the process.
While some granule loss is normal with brand-new shingles, gutters replace filled with excessive granules on day one may signal defective materials or rough installation handling. You should also confirm that a magnetic sweep was performed across your entire property, as stray roofing nails can easily puncture tires or cause injuries. Since cleanup responsibilities should be clearly outlined in your contract, it is best not to assume these steps are automatic.
Go Into the Attic Within 48 Hours
This step is both the most overlooked and the most important. Within a day or two of installation, and ideally before rainfall, you should grab a flashlight and inspect your attic for daylight coming through the decking, which often indicates gaps. You are also checking for moisture or staining on rafters, as well as confirming that ridge and soffit vent openings are clear and that insulation is not blocking critical ventilation pathways.
Building codes commonly require one square foot of ventilation per 300 square feet of attic space, as poor ventilation is one of the leading causes of premature shingle failure and can trap heat, significantly raising cooling costs during summer months. If ventilation was improperly installed or blocked during roofing work, it can shorten the shingle lifespan dramatically, so catching this early allows for correction before long-term damage begins.
Review the Contractor’s Completion Checklist Before Final Payment
This may be the most important section of all. While most homeowners hand over final payment the moment the crew leaves, you should instead request a written completion checklist before releasing the final check. When determining what to check after having a new roof installed, that checklist should include specific roofing materials used including the brand, type, and warranty terms along with underlayment and flashing details, nailing pattern compliance, and confirmation of drip edge installation.
It is also beneficial to have photo documentation of key installation phases, as manufacturer warranties often require proof that materials were installed according to exact specifications. Without this documentation, warranty claims can be denied even if materials fail prematurely. Furthermore, depending on your municipality, permit documentation may be required; having a complete paper trail protects you during future home resales and insurance claims.
Verify and Register Your Warranties Immediately
Most roofs include two warranties: a manufacturer’s material warranty, which typically lasts 30–50 years, and a contractor’s workmanship warranty, often spanning 5–10 years. Both usually require registration within a specific timeframe to remain valid.
You should read the warranty documents carefully to identify what voids coverage, whether annual inspections are required, and what the specific maintenance requirements are, as well as the terms for transferability to future homeowners.
Many homeowners never register their warranty, unknowingly forfeiting their coverage, so it is vital to store both digital and physical copies in a safe place. Understanding the necessary steps after having a new roof installed includes ensuring your protection is officially activated, as this paperwork may be essential years down the road.
When to Call a Third-Party Inspector
If you notice red flags, had communication issues with your contractor, or simply want peace of mind, a third-party roof inspection can be invaluable.
Certified independent inspectors provide unbiased assessments. If problems are identified, reputable contractors will typically correct them at little or no charge.
Additionally, a third-party inspection report becomes powerful documentation in insurance disputes. This is especially important if you were not present during installation.
For homeowners unsure about to check after having a new roof installed, professional verification offers clarity and protection.
What Comes Next Your First-Year Maintenance Plan
Once your checklist is complete, set reminders for follow-up inspections.
Inspect the roof:
-
After the first major storm
-
At the 12-month mark
-
Each fall when cleaning gutters
Watch for granule changes, lifted shingles, algae growth, or debris buildup. Early detection keeps small issues from crossing warranty thresholds or becoming structural damage.
Seasonal inspections preserve your investment and extend roof lifespan significantly.
Final Thoughts
Knowing what to check after having a new roof installed can save you thousands of dollars and prevent long-term headaches. A simple six-step review visual inspection, cleanup verification, attic check, documentation review, warranty registration, and optional third-party inspection ensures your investment is protected from day one.
Catching problems early is always cheaper than discovering them after a storm. If you’re unsure about your installation, schedule to contact us, a professional post-installation inspection and gain the confidence that your new roof was done right.
FAQs
1. How soon should I inspect my roof after installation?
You should inspect your roof immediately after installation and again after the first major storm to catch early installation issues or material defects.
2. What are signs of poor roof installation?
Uneven shingles, exposed nails, improper flashing, sagging areas, or debris left behind may indicate installation problems that need prompt correction.
3. Should I check the attic after a roof replacement?
Yes, inspect the attic for daylight gaps, moisture stains, and proper ventilation to ensure the new roofing system was installed correctly.
4. Why is ventilation important after a new roof is installed?
Proper ventilation prevents heat and moisture buildup, extends shingle lifespan, lowers energy bills, and helps maintain warranty compliance.
5. Do I need to register my roofing warranty?
Yes, most material and workmanship warranties require registration within a deadline. Failure to register can void long-term coverage.